Jun 25, 2013

RICETTA: GUSTOSI MUFFIN CAROTE E ALBICOCCHE (Tasty apricot and carrot muffins)


   Le albicocche sono da sempre uno dei miei frutti preferiti in assoluto, fin da quando ero piccola. Il loro sapore dolce e il colore caldo aranciato mi fanno pensare all'estate e alle belle giornate passate all'aria aperta  nei campi e ogni anno aspetto con impazienza che facciano la loro comparsa dal fruttivendolo. Quest'anno, grazie alla pioggia e al freddo (sigh) sono arrivate più tardi del previsto ma come al solito sono buonissime, morbide e dolci.
   Ovviamente non potevo non fare dei muffin alle albicocche. Dato che il loro sapore acidulo diventa più evidente in cottura, ho aggiunto un paio di carote per bilanciare il gusto.


  Apricots have always been one of my favourite fruits  ever since I was a child. Their sweet yet tangy flavour and their warm color remind me of summer and sunny days spent in the open fields; so I impatiently wait for this fruit to be in season every year. This year, thanks to the cold and the rain (sigh) apricots started to ripen later than usual but, finally, they're here, as tasty and as sweet as usual.
   I obviously had to cook apricot muffins. Ginven their tangy flavour,which becomes more evident after the baking, I decided to add a couple of carrots to balance it.

Ingredienti per 12/13 muffin:


  • 250 gr farina 00.
  • 150 gr di zucchero scuro o bianco.
  • 250 gr di yogurt bianco o all'albicocca.
  • 60 gr di burro fuso.
  • 2 uova.
  • un cucchiaio di lievito.
  • una bustina di vanillina (facoltativa).
  • un pizzico di cannalla e noce moscata (facoltative).
  • 2 carote medie.
  • 4 albicocche piccole o 3 grandi.
Preriscaldiamo il forno a 180°C.

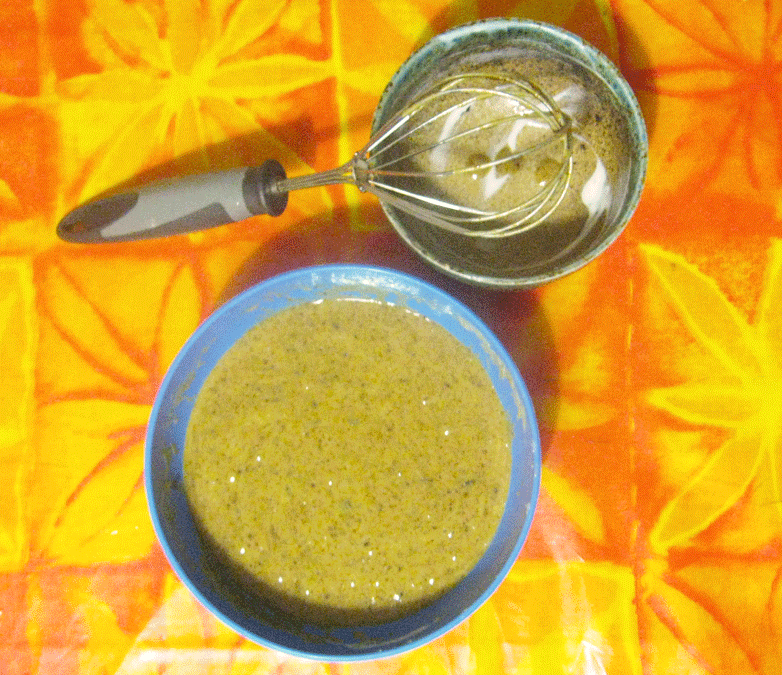
Ho aggiunto cannella e noce moscata dopo aver fatto la foto. Ops.
I added cinnamon and nutmeg after taking this picture. Ups.

Ingredients for 12/13 muffins:


  • 250 gr whole wheat flour.
  • 150 gr brown sugar (or white, you decide).
  • 250 gr plain yogurt (other suggestions: vanilla or chocolate chip yogurt).
  • 2 eggs.
  • 1 Tsp baking powder.
  • 1/4 tsp of vanillin (optional).
  • 60 gr melted butter.
  • a pinch of cinnamon and nutmeg (optional).
  • 2 medium carrots.
  • 4 small apricots or 3 large apricots.
Preheat the oven to 350°F (180°C).

Step 1) Grattugiamo le carote. Tagliamo a cubetti le albicocche, lasciando 12 spicchi per decorare (facoltativo). Mettiamo da parte.


Step 1) Grate the carrots and chop the apricots in small pieces. Cut one in 12 slices that will be used to garnish (optional). Put apart.

Step 2) In un'ampia ciotola mescoliamo farina, lievito, vanillina, noce moscata e cannella. 


Step 2) In a large bowl sift together flour, baking soda, nutmeg, vanillin and cinnamon.

Step 3) In una ciotola diversa mescoliamo uova, zucchero, burro sciolto e yogurt.


Step 3) In a different bowl cream together sugar, eggs, melted butter, yogurt and vanilla extract.

Step 4) Uniamo il mix di farina e gli ingredienti liquidi.


Step 4) Mix dry and wet ingredients.

Step 5) Aggiungiamo albicocche a pezzi e le carote. Ricordate di tenere da parte gli spicchi di albicocca se volete usarli per decorare. 


Step 5) Add the carrots and the chopped apricots. Remember to keep the slices if you want to use them for garnish. 

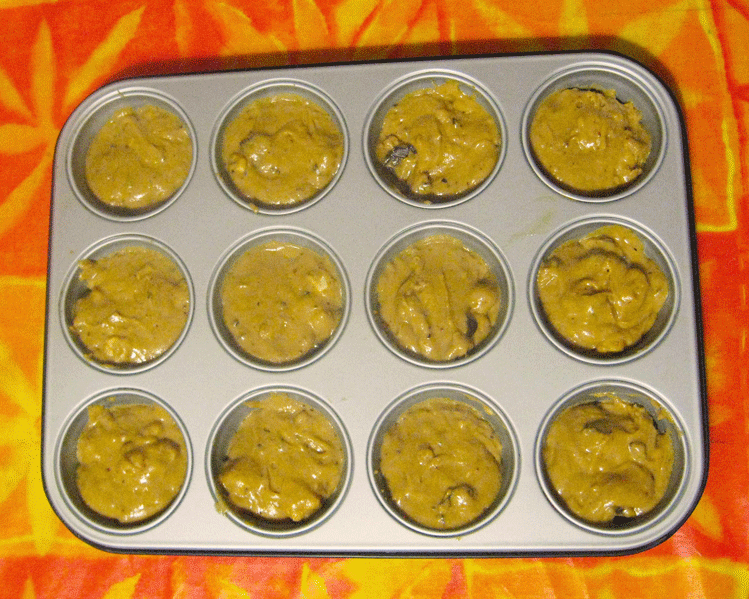
Step 6) Dividiamo il composto negli stampini per muffin mettendo al centro di ciascuno una fetta di albicocca e, se volete, la punta di un cucchiaino di zucchero semolato per creare la crosticina sulla cupola. Cuociamo per 15 minuti a 180°C. 


Step 6)  Spoon the mix into a greased muffin tin, place a slice of peach on each. Sprinkle with 1/2 tsp of raw sugar if you want a crunchy top. Bake at 350°F (180°C) for 15 minutes.


Ta-daaah!
  Questi muffin vanno assolutamente mangiati dopo che si sono raffreddati: appena sfornati, infatti, il sapore acidulo delle albicocche ha il sopravvento su tutto il resto. Una volta freddi invece sono molto più bilanciati nel gusto con l'acido che rimane in retrogusto e il dolce molto più evidente. La consistenza è estremamente soffice e piacevole per via della grossa quantità di frutta. Sono decisamente adatti ad una merenda estiva accompagnati da un bel bicchiere di tè freddo. Buon appetito!

   Let the muffins cool before eating: when they come out of the oven the tanginess is very strong and preponderand. Once cooled the flavour is balanced and the sweetness becomes way more evident. The texture is extremely soft and moist thanks to the great amount of fruit. These muffins, accompanied with a cool glass of tea, are perfect for a summer  snack. Enjoy!
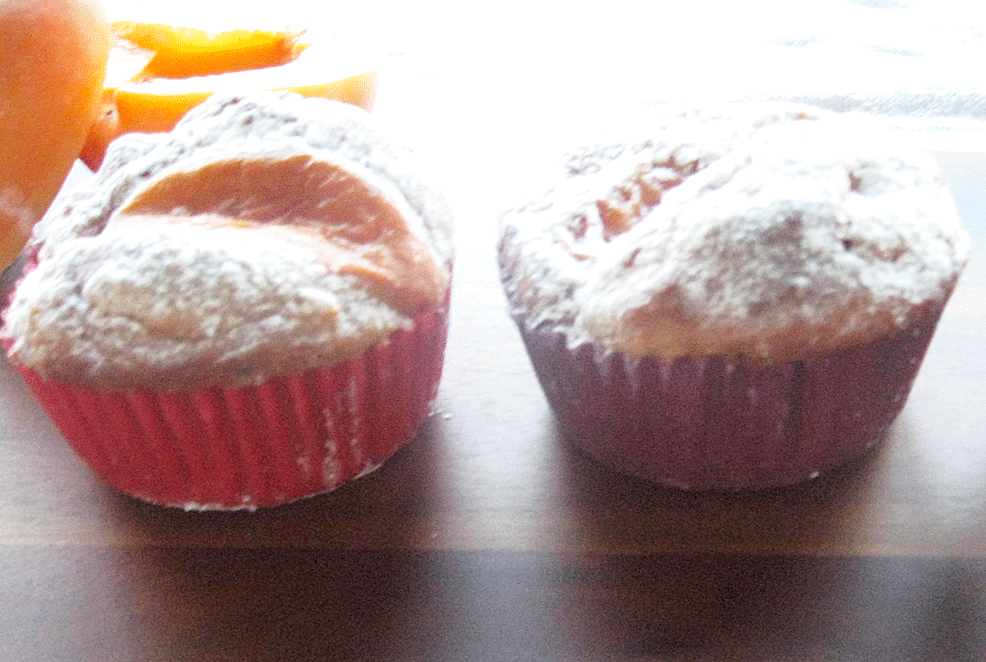
Il loro profilo migliore. Sfuocato.
Their best side. Blurry.


Alla prossima,

Until next time,

Alice

PS - I would be grateful if you'd correct my English when you find mistakes! Thanks!

Jun 21, 2013

TUTORIAL: BIGLIETTO KIRIGAMI TOUR EIFFEL (Tour Eiffel Kirigami Card)


   Dopo l'Empire State Building, il pianoforte e il mughetto vi propongo un nuovo tutorial di kirigami (i gemelli cattivi degli origami in cui la carta si piega E si taglia wooow). Il kirigami della Tour Eiffel è molto molto semplice da realizzare: la parte di taglio è un po' noiosa per via di tutti quei rettangolini ma la piega, che di solito è la parte più difficile, in questo caso è molto semplice. Se volete semplificarvi ulteriormente la vita potete disegnare, anziché tagliare le parti interne e fare il kirigami della sola silhouette della torre. Tipo così.
   Per quanto riguarda i materiali due cose sono necessarie: (1) il taglierino che usate dev'essere affilatissimo e appuntito per cui consiglio di iniziare da una nuova lama, (2) la carta deve avere il giusto spessore. L'ideale sono i fogli da 220gr/m² tipo Fabriano F4 da disegno tecnico. In generale, il peso della carta può variare tra i 160 e il 250gr/m²; scegliete la carta secondo la vostra esperienza: più è sottile, più è facile da tagliare e piegare.


After the Empire State Building, the piano and the lily of the valley, here's a new kirigami (the evil twin of origamis, in which you fold AND cut the paper, uuuh) tutorial. The Eiffel Tower kirigami is fairly simple: the cut is a little bit boring because of all the little squares but the fold, which usally is the most challenging part, is easy and straightforward. If you want to make it even more simple you can draw the internal lines instead of cutting them. You will have a silhouette kirigami. A bit like this one.
  As for the materials, there are two things to keep in mind: (1) the cutter must be extremely sharp. When starting a new template it is advisable to use a new blade in your cutter/craft knife. (2) The paper must have the right thickness. Make sure that it is between 160 and 250 g/sq. Choose the weight according to your experience: the lighter the card, the easier it is to cut and fold. 


Materiali:
  • Cartoncino da disegno tecnico tra i 160 e i 250 gr/m².
  • Taglierino affilato.
  • Righello, possibilmente di metallo.
  • Matita e gomma se disegnate lo schema direttamente sul foglio da tagliare. OPPURE scotch per attaccare il template sul foglio da lavoro.


Materials:


  • Card between 160 and 250 g/sq.
  • Sharp cutter.
  • Ruler, possibly a metal one. 
  • Pencil and eraser (if you choose to draw your own model) OR removable tape/glue.

Kirigami template:


Tagli e pieghe si effettuano in questo modo:

Linee continue --> Tagli
Linee puntinate --> Pieghe a monte (verso il fuori)
Linee tratteggiate --> Pieghe a valle (all'interno)
Linea puntinata più marcata --> è il punto in cui il biglietto va piegato in due.


Clicca per ingrandire.
Clik to enlarge.


Template key

___________ : Cutting line
...........(bold): Gutter fold
-----------:Valley fold (inwards)
...........: Mountain fold (outwards)

Step 1) Copiamo a mano il template sul foglio di lavoro oppure stampiamolo e, con lo scotch, attacchiamolo al foglio. Per chi sceglie il secondo metodo, consiglio di passare tre o quattro volte lo scotch sul palmo della mano per renderlo meno appiccicoso e più facile da rimuovere a taglio terminato.


Step 1) Copy the template on your card OR print it on office paper. Then affix it to your card, using removable tape on all four corners. If you don't have removable tape, you can use regular tape: just press it on your palm three or four times  to remove some of the stickiness before using it.

Step 2) Tagliamo il template a partire dai quadratini interni. 


Step 2) Begin to cut the template, starting from the interior lines.

Step 3) Finite tutte le parti interne, tagliamo i bordi della Tour Eiffel.

Step 3) After the interior cutting lines, move on to the exterior lines.

Step 4) Girando il foglio al contrario, spingiamo delicatamente le pieghe a valle, poi ruotiamo e cominciamo a dare gradualmente forma a tutte le pieghe. Aiutandoci con entrambe le mani pieghiamo la linea centrale del bigliettino e premiamo delicatamente per dargli forma. Quando tutte le pieghe sono ben marcate, pieghiamo lentamente in due il bigliettino, assicurandoci che tutte le pieghe siano corrette, finché non si chiude completamente. Facciamo pressione sul biglietto piegato. 

 
Step 4) Filp the card on the back and gently push the valley folds at the base of the tower towards you, so that you begin to mark the folds. Rotate the template and continue in the same way with the valley folds at the top of the tower and in the middle of the structure. Continue turning the template and working on the valley folds. 
Holding the template with both hands, fold the gutter line. 
When all the folds are well marked, slowly close the card along the centre, ensuring that all the folds are correct, then press the card down firmly. 


Il bigliettino è finito! Adesso non resta che esporlo o decorarlo ulteriormente se si tratta di un biglietto d'auguri.


The card is finished! Now you can display it or decorate it if you want tu use it as a greeting card. 

Questo è un'altro lavoro che ho fatto recentemente. Come difficoltà è su un altro livello, tanto che ci ho messo tre tentativi prima di farne uno decente. Se vi interessa un tutorial sul Colosseo fatemi sapere e scriverò un post apposito ;-)

Alla prossima.


This is another kirigami I made recently. Compared to the Tour Eiffel is on another planet. It is so difficult I had to retry it three times. If you are interested in this model let me know and I will write a dedicated post. 

Until next time, 

Alice 

Jun 19, 2013

RICETTA: MUFFIN AL DOPPIO CIOCCOLATO (Double chocolate muffins)


   Un po' in ritardo sulla tabella di marcia, ecco i muffin di questa settimana! Yay! Questa volta lo chef (eheheh indovinate chi è?) propone muffin al doppio cioccolato. Una vera delizia ma forse un pelino eccessivi per questi giorni caldissimi. In effetti,   a differenza dei soliti muffin, che vengono spazzolati via in men che non si dica, questi stanno venendo mangiati piano piano a colazione quando ancora non fa un caldo infernale.  Diciamo che sono un po' stata costretta dalle circostanze: niente di commestibile colazione e due tipi di cioccolato avanzati in dispensa che cominciavano a sciogliersi quando il termometro ha raggiunto e superato i 35°C. 
   In questi giorni capisco come si dev'essere sentita la povera strega del Mago di Oz quando si è sciolta.

   A little late on the schedule, here we are with this week's muffins, yaay! Today the chef (ehehe guess who's le chef?) suggets double chocolate muffins. A real treat, although maybe not the best choice in this excessively hot weather. As a matter of fact, these muffins are being eaten very slowly, only in the morning when the temperature is not too hot. Anyways, I was kind of compelled by the circumstances: no breakfast materials and some chocolate leftovers starting to melt thanks to the rising temperature.
   In these days I really feel for the poor meltin' witch of Oz.


Ingredienti per 12 muffin: 
  • 250 gr farina 00.
  • 150 gr zucchero scuro o bianco.
  • 2 uova.
  • un cucchiaio di lievito.
  • mezza bustina di vanillina (facoltativa).
  • 50 gr burro fuso.
  • 250 gr di yogurt bianco (oppure, consigliati, vaniglia o stracciatella).
  • 100 gr cioccolato fondente spezzettato grossolanamente.
  • 100 gr cioccolato bianco spezzettato grossolanamente.
I tipi di cioccolato usato possono variare a piacere. Vanno benissimo anche cioccolati aromatizzati che possono essere coordinati allo yogurt.

Accendiamo il forno ventilato a 180°C.


Ingredients for 12 muffins:
  • 250 gr whole wheat flour.
  • 150 gr brown sugar (or white, you decide).
  • 250 gr plain yogurt (other suggestions: vanilla or chocolate chip yogurt).
  • 2 eggs.
  • 1 Tsp baking powder.
  • 1/4 tsp of vanillin (optional).
  • 50 gr melted butter.
  • 100 gr dark chocolate, chopped.
  • 100 gr white chocolate, chopped.
You can vary the type of chocolate to suit your taste from sweet milk chocolate to dark bittersweet. You can also use flavoured chocolate and choose yogurt flavours accordingly.

Preheat the oven to 350°F (180°C).


Step 1) In un'ampia ciotola setacciamo insieme farina, lievito e vanillina.


Step 1) In a large bowl sift together flour, baking powder and vanillin.

Step 2) In una ciotola separata mescoliamo uova, yogurt, burro sciolto e zucchero.


Step 2) In a different bowl cream together sugar, eggs, melted butter and yogurt.

Step 3) Mescoliamo il mix di farina con gli ingredienti liquidi poi aggiungiamo i due cioccolati.


Step 3) Mix dry and wet ingredients then add the chopped chocolate.

Step 4) Dividiamo il composto negli stampi per muffin e inforniamoli per 15 minuti. 


Step 4)  Spoon the mix into a greased muffin tin. Bake at 350°F (180°C) for 15 minutes.

Et voilà!

  I muffin sono pronti. Se si vuole si può aggiungere una spolverata di zucchero a velo, altrimenti si possono ricoprire con una glassa al cioccolato per un effetto ancora più sano e leggero (eheheh); sono buonissimi e belli soffici ma forse più adatti al letargo invernale che all'afa estiva. 
  Forse vi chiederete: "Come mai ha detto che non aveva niente per colazione e poi è spuntato un bel po' di yogurt?" Il fatto è che il moroso, che tanto snobbava i miei muffin quando cominciai a farli qualche mese fa, adesso snobba lo yogurt. 


Our double chocolate muffins are ready. If you want, you can sprinkle them with icing sugar or make a chocolate icing for an even healthier and lighter treat (eheheh). These muffins are really good and super moist but probably a tiny bit too heavy for the summer.
  If you're asking yourself: "Why did she say she had nothing for breakfast and then she put a ton of yogurt in her muffins?" truth is, my boyfriend, who snubbed my muffins when I first started to cook them, now snubs the yogurt. 


Alla prossima,

Until next time, 

Alice


PS - I would be grateful if you'd correct my English when you find mistakes! Thanks!

Jun 11, 2013

RICETTA: DELIZIOSI MUFFIN ALLE PESCHE (Delicious peach muffins)


La cosa bella dell'avere un blog sconosciuto è che se non scrivi per due settimane perché stai disperatamente cercando di finire la tesi, nessuno se ne accorge. Tempo per i post non ne avevo ma per cucinare, quello c'è sempre ehehe. (È giunto il momento di: "procrastination the musical"!)
I muffin che vi propongo oggi sono assolutamente deliziosi. Sono stati una sorpresa anche per me perché era la prima volta che tentavo di integrare le pesche nei muffin. Ebbene, il frutto dell'esperimento è stato buono oltre le mie aspettative. Da ripetere assolutamente!


The one good thing of having a little known blog is that nobody will care if you don't write for a bunch of days, desperately trying to finish your thesis. So I didn't have much time for blogging but somehow I found enough to cook. (It's time for "procrastination the musical"!).
These peach muffins are absolutely divine.  They were a surprise for me as well since it was the first time I had ever tried cooking muffins with peaches. The fruit of my experiment was beyond my expectations. I'm definitely going to cook these again!


Ingredienti per 12 muffin:

  • 250 gr farina 00 setacciata.
  • 150 gr di zucchero grezzo (va bene anche bianco naturalmente).
  • 200 gr di yogurt bianco o alla pesca (vanno bene anche altri gusti ma si sentono molto nel muffin pronto per cui attenzione agli accostamenti).
  • 2 uova.
  • 50 gr di burro fuso.
  • un cucchiaio da minestra di lievito.
  • 3 pesche mature.
  • un cucchiaino raso di cannella (opzionale).
  • un pizzico di noce moscata (opzionale).
  • 3-4 gocce di estratto di vaniglia o mezza bustina di vanillina (opzionale).
  • zucchero grezzo per decorare (opzionale).
Preriscaldiamo il forno a 180°C.


Ingredients for 12 muffins:

  • 250 gr whole wheat flour.
  • 150 gr brown sugar (or white, you decide).
  • 200 gr plain or peach yogurt (you can use a different flavor if you like but remember that you'll taste it A LOT in the baked muffin).
  • 2 eggs.
  • 50 gr melted butter.
  • 1 Tsp baking powder.
  • 3 ripe peaches.
  • 1 tsp cinnamon (optional).
  • a pinch of nutmeg (optional).
  • 3-4 drops of vanilla extract or 1/4 tsp of vanillin (optional).
  • some raw sugar (optional).
Preheat the oven to 350°F (180°C).


Step 1) Sbucciamo due pesche e tagliamole a dadini. Alla teza pesca lasciamo la buccia e tagliamola in 12 spicchi. Mettiamo da parte.


Step 1) Peel 2 peaches and chop them in small pieces. Cut the third peach into 12 slices. Put apart.

Step 2) Mescoliamo farina, lievito, cannella, noce moscata e vanillina.


Step 2) In a large bowl sift together flour, baking soda, nutmeg, vanillin and cinnamon.


Step 3) Separatamente mescoliamo uova, yogurt, burro fuso, zucchero e l'estratto di vaniglia.


Step 3) In a different bowl cream together sugar, eggs, melted butter, yogurt and vanilla extract.


Step 4) Mescoliamo insieme il mix di farina con gli ingredienti liquidi e le pesche a cubetti.


Step 4) Mix dry and wet ingredients. Add the chopped peaches.

Step 5) Dividiamo il composto negli stampi da muffin ponendo al centro uno spicchio di pesca. Per creare la crosticina lucida sul muffin cotto si può aggiungere  mezzo cucchiaino di zucchero grezzo. Inforniamo a 180° C per 15 minuti..


Step 5) Spoon the mix into a greased muffin tin, place a slice of peach on each. Sprinkle with 1/2 tsp of raw sugar if you want a crunchy top. Bake at 350°F (180°C) for 15 minutes.

Ta- daaah! I muffin alle pesche sono pronti! Come potete vedere dalla foto uno è stato prontamente assaggiato per accertamenti scientifici. Sono troppo buoni, davvero. Da provare assolutamente!

Trova l'intruso!
Which one doesn't belong?

Ta-daah. Our peach muffins are ready! As you can notice one was promptly tried for scientific purposes, of course. They're unbelivably good. You must try.

Ho la casa talmente profumata da 'sti cosi che non riesco a smettere di salivare.
My house is filled with the scent of these beauties. I can't stop drooling! 


DOVETE provare questa ricetta e dirmi cosa ne pensate!

You MUST try this recipe and tell me what you think about it. 


Alla prossima,

Until next time,

Alice

PS - I would be grateful if you'd correct my English when you find mistakes! Thanks!