Jul 24, 2013

TUTORIAL: CUPCAKE IN FELTRO (Felt Cupcakes)


Qualche mese fa ho comprato da Tiger un bel grembiule rosa a pois - lo sfondo di questa foto -, un po' perché mi piaceva ed era molto economico, un po' per migliorare le mie capacità di cucito amatoriale. Volevo creare delle decorazioni in feltro da applicare sul davanti o sulle tasche del grembiule e quindi ho deciso di fare questi simpatici cupcake. 
Sono rimasta molto soddisfatta del risultato e ho deciso di farne altri da usare come decorazioni per i pacchi di dolcetti che ogni tanto regalo agli amici. 
Come tutti i lavori in feltro sono piuttosto semplici da fare e se come me non siete delle cime nel ricamo, il feltro è il materiale perfetto per fare pratica e tirare fuori cose carine senza troppo sforzo. Buon lavoro!


A few months ago I bought a cute pink apron with white polka dots – the background of the picture above – at Tiger store. I bought it not only because it was super cheap and cute but also to practice my sewing skills: I wanted to create some felt appliqués and stitch them on the apron. therefore I made these cute cupcakes. I must say, I was so satisfied with the result that I’ve decided to make more to use as gift tags and scented drawer sachets.
As pretty much every felt project, these cupcakes are easy to make even if you are not incredibly skilled in needle arts. In fact, felt is the perfect material to practice your sewing and you can easily create pretty things without too much effort or know-how. Have a good sewing!

Materiali:
  • Fogli di feltro in vari colori.
  • Carta e marcatore a punta spessa.
  • Forbici.
  • Ago e filo da ricamo colorato.
  • Perline per decorare (facoltative).

Supplies: 
  • Felt sheets in assorted colors.
  • Paper and black marker.
  • Scissors.
  • Emboridery needle and thread.
  • Beads (optional).


Step 1) Innanzitutto bisogna pensare al design. Ho disegnato una serie di possibili cupcake che fossero graziosi ma anche facili da tagliare e cucire. Alla fine ho  scelto due modelli e li ho ritagliati.


Step 1) Firt thing first - the design. I draw a few easy-to-cut-and-sew cupcakes on a regular sheet of paper, I choose two models and cut them out. 


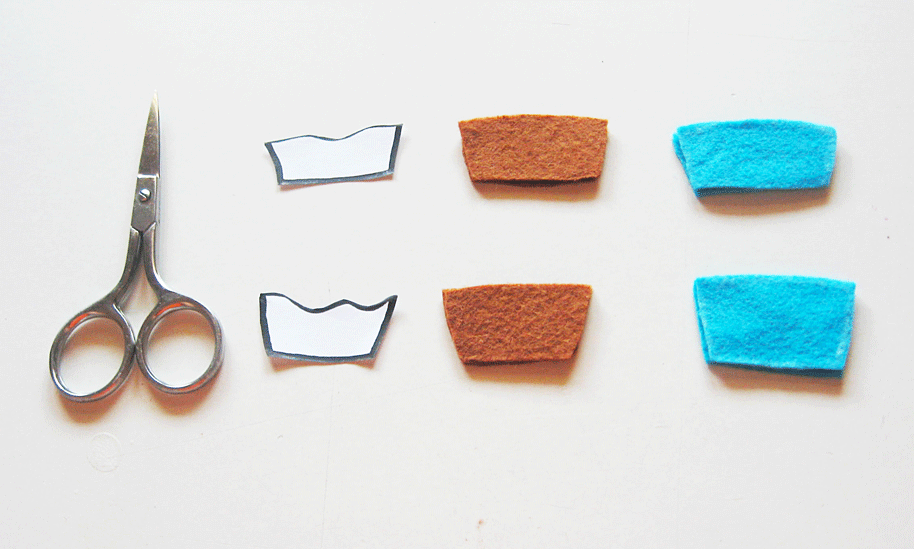
Step 2) Tagliamo i vari componenti del cupcake "sembrando" il design iniziale e ritagliando le varie forme dal feltro. Il contorno può essere segnato con del gesso prima di tagliare oppure potete semplicemente tenere il pezzo di cupcake appoggiato sul feltro mentre tagliate intorno.


Step 2) Cut the pattern pieces from felt. You can draw the outline on the felt with some chalk or pin the design on the felt and cut around it. 


Voilà! Mi sono tenuta aperte varie opzioni di colore e ho deciso di fare anche delle piccole ciliegie, sempre in feltro.


Voilà. I prepared a few options and I decided to add some felt cherries.

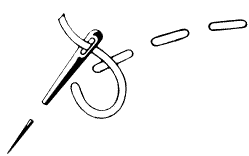
Step 3) È il momento di cucire. Ho fatto dei punti piatti classici. Non ho idea di come si chiamino in italiano perché leggo sempre manuali di cucito in inglese, in ogni caso si chiamano running stitches e sono questi: 


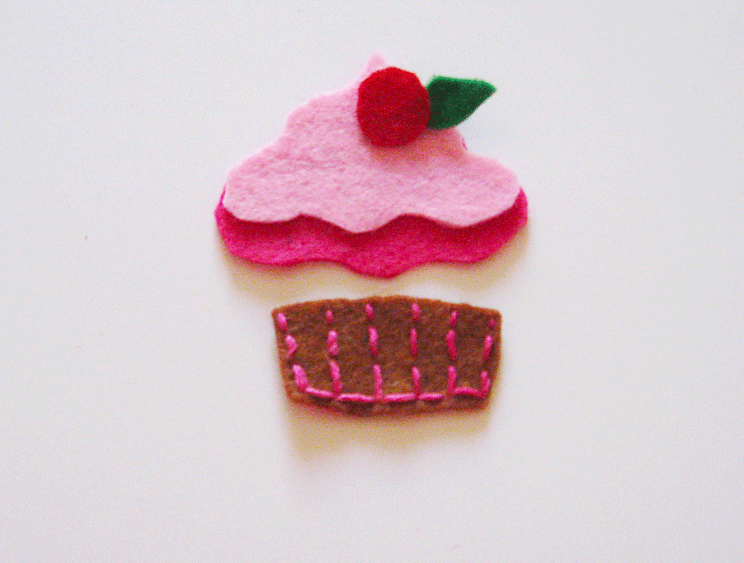
Li ho usati sia per creare la decorazione tipo "pirottino di carta" alla base del cupcake, sia per contornare tutto il design. 


Step 3) It's stitching time! Using your emboridery needle and emboridery thread, hand-stitch the part of the cupcake together. You can use simple running stitches for everyhing, the way I did.


Step 4) Alla fine ho aggiunto la ciliegia direttamente sul lavoro finito con un punto a croce. 


Step 4) Lastly, add the cherry with one cross stitch and you're done :-)

Fatto! Decidete pure cosa volte fare coi vostri cupcake in feltro. Un paio, come dicevo, li ho cuciti sul grembiule, altri li userò come decorazione per i regali delle mie amiche. Se raddoppiate la stoffa potete fare dei sacchettini e riempirli di materiale profumato (grani di lavanda, ad esempio) per metterli nei cassetti della biancheria. Un po' come avevo fatto col border collie in feltro.

Buon divertimento!


Done! now you just have to decide how to use these cute felt cupcakes. As I said, I sew these two on my pink apron but I made more and I will use them as gifl tags. If you double the material you can sew small sachets as I did here.

Alla prossima, 

Until next time,

Alice

PS - I would be grateful if you'd correct my English when you find mistakes! Thanks!

Jul 18, 2013

RICETTA: DELIZIOSI MUFFIN CIOCCOLATO E LAMPONI (Delicious raspberry & chocolate muffins recipe)


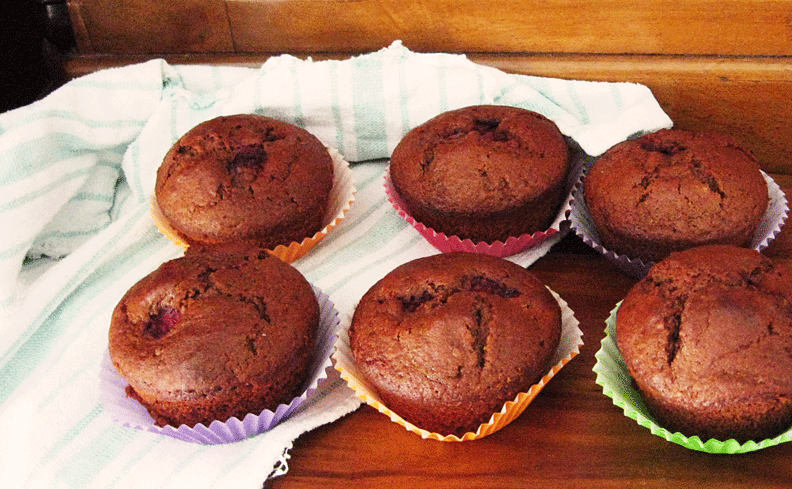
Per quanto i muffin mi piacciano tantissimo devo ammettere che difficilmente mi provocano la stessa attrazione magnetica di un bel cupcake, con tanto di panna o crema al burro e guarnizione di frutta fresca. I muffin sono decisamente più spartani e meno voluttuosi. Eppure vi sono certe combinazioni di ingredienti che, se non arrivano a livello cupcake, ci vanno pericolosamente vicine. Una è il muffin alla pesca, un'altra è cioccolato e lamponi. Questi due ingredienti, insieme, sono una bomba. Il risultato, oltre ad essere favolosamente buono è anche appagante esteticamente grazie ai lamponi che arrossiscono piacevolmente l'interno del muffin.

Even though I really love muffins I must admit it: they hardly attract me the same magnetic way a cupcake – with its butter or whipped cream  and fresh fruit garnish - can do. Muffins are way simpler and less voluptuous. And yet, there are some combinations of ingredients almost as decadent. For instance, peach muffins are just as irresistible as a good cupcake. Another must-try are chocolate and raspberry muffins. These two ingredients, mixed together, are heavenly. The result, beside being fabulously tasty, is aesthetically appealing thanks to the raspberries that give a cute blush of red to the muffins.

Igredienti per 12 muffin: 

  • 250 gr frina 00.
  • 150 gr zucchero (io ho usato un mix di zucchero raffinato e scuro).
  • un vasetto di yogurt bianco o al lampone.
  • 100 gr di burro fuso.
  • un cucchiaio di lievito.
  • 50 cl di latte.
  • 3 cucchiai di cacao amaro.
  • 2 uova.
  • una vaschetta di lamponi.
  • qualche goccia di essenza di vaniglia (opzionale).
Preriscaldiamo il forno a 180°C.


Ingredients for 12 muffins:


  • 250 gr whole wheat flour.
  • 150 gr sugar (I mixed white and brown).
  • 125 gr plain or raspberry yogurt (you can use a different flavor if you like but remember that you'll taste it A LOT in the baked muffin).
  • 2 eggs.
  • 50 cl milk.
  • 100 gr melted butter.
  • 3 Tsp of unsweetened cocoa powder.
  • 1 Tsp baking powder.
  • 3-4 drops of vanilla extract or 1/4 tsp of vanillin (optional).
Preheat the oven to 350°F (180°C).


Step 1) In un'ampia ciotola mescoliamo farina  setacciata con cacao amaro e lievito.

Step 1) In a large bowl sift together  and pix flour, baking soda and the unsweetened cocoa powder.

Step 2) In una ciotola separata mescoliamo burro fuso, uova, zucchero,  yogurt e estratto di vaniglia.


Step 2) In a different bowl cream together sugar, eggs, melted butter, yogurt and vanilla extract.

Step 3) Uniamo gli ingredienti liquidi col mix di farina.


Step 3) Mix dry and wet ingredients.

Step 4) Dividiamo l'impasto negli stampi per muffin e, prima di infornare, immergiamo al centro di ognuno due o tre lamponi.


Step 4) Spoon the mix into a greased muffin tin. Place two or three raspberries at the centre of each unbaked muffin. Bake at 350°F (180°C) for 15 minutes.


Pronti! Non resta che gustarli in compagnia di una tazza di tè o caffellatte mattutino. L'acidulo del lampone si sposa incredibilmente bene col dolce del muffin e il cioccolato e la ciliegina sulla torta. Buon appetito!


Ready to be savoured with a cup of tea or a morning latte. The tanginess of the raspebbries is perfectly balanced with the sugary muffin and the "chocolatiness" is just the cherry on top. Enjoy!

Alla prossima,

Until next time, 

Alice

Jul 12, 2013

RICETTA: MUFFIN CIOCCOLATO E MIRTILLI (Chocolate blueberry muffins recipe)


Bonjour, ho appena scoperto che i mirtilli e il cioccolato sono un abbinamento fantastico. Chi l'avrebbe mai detto?! eheheeh, scherzo. Comunque, ecco qua una ricetta di muffin nuova nuova. Indovinate a cosa sono questa volta?

Bonjour, I just found out that blueberries are great with chocolate. Who knew?! eheheh I'm joking, of course. Anyways, here's my new muffin recipe. Guess what kind of muffins I made this time?

Ingredienti per 12 muffin:


  • 250 gr farina 00.
  • 150 gr di zucchero grezzo o bianco.
  • 100 gr di burro fuso.
  • un vasetto di yogurt bianco o ai mirtilli (potete usare anche altri gusti, solo fate attenzione agli abbinamenti perché si sentono molto nel muffin cotto)
  • 50 cl di latte.
  • 3 uova.
  • 125 gr di mirtilli freschi o surgelati.
  • 30 gr di cacao amaro.
  • un cucchiaio di lievito per dolci.
  • vanillina o essenza di vaniglia (facoltativa).
Preriscaldiamo il forno a 180°C.


Ingredients for 12 muffins:

  • 250 gr whole wheat flour.
  • 150 gr brown sugar (or white, you decide).
  • 125 gr plain or blueberry yogurt (you can use a different flavor if you like but remember that you'll taste it A LOT in the baked muffin).
  • 3 eggs.
  • 50 cl milk.
  • 100 gr melted butter.
  • 30 gr of unsweetened cocoa powder.
  • 1 Tsp baking powder.
  • 125 gr frozen or fresh (better) blueberries.
  • 3-4 drops of vanilla extract or 1/4 tsp of vanillin (optional).
Preheat the oven to 350°F (180°C).


Step 1) In un'ampia ciotola mescoliamo la farina setacciata col cacao e il lievito.


Step 1) In a large bowl sift together  and pix flour, baking soda and the unsweetened cocoa powder.

Step 2) In un'altra ciotola mescoliamo uova, burro fuso, latte, yogurt, zucchero e l'essenza di vaniglia.


Step 2) In a different bowl cream together sugar, eggs, melted butter, yogurt and vanilla extract.

Step 3) Uniamo il mix di farina con gli ingredienti liquidi.


Step 3) Mix dry and wet ingredients.

Step 4) Ora aggiungiamo i mirtilli mescolando delicatamente.


Step 4) Gently add the blueberries.

Step 5) Dividiamo il composto negli stampi per muffin imburrati e infarinati o direttamente nei pirottini. Inforniamo per 15 minuti.


Step 5)  Spoon the mix into a greased muffin tin. Bake at 350°F (180°C) for 15 minutes.


Et voilà! Una spolveratina di cacao e son pronti da mangiare. Devo confessare che avevano un tale potenziale come cupcake che alla fine non ho resistito e ho finito per "competarli" con panna e altri mirtilli freschi decorativi. Buonisimi! Molto apprezzati dagli amici.

Sfocato ma buono.
Blurry but tasty.

Et voilà! Just sprinkle your muffins with some cocoa powder and they're ready. I must confess that the "cupcake potential" was so inviting that I couldn't resist and I "completed" them with whipped cream and fresh blueberries. Too good. My friends can confirm it. 

Alla prossima,

Until newt time,

Alice

PS - I would be grateful if you'd correct my English when you find mistakes! Thanks!

Jul 3, 2013

TUTORIAL: BIGLIETTO D'AUGURI CON GUFO (Owl greeting card)


Mio fratello minore ha appena terminato la maturità! Evviva! Per festeggiare ho preparato una bella torta con questa ricetta come base più panna, crema e fragole poi ho fatto questo biglietto con gufo da accompagnare al regalo dei miei genitori: l'aifon™. 
Il gufo è molto semplice da realizzare. Una volta fatto potete utilizzarlo non solo per decorare biglietti a vostro piacimento ma anche per sigillare regali o potete appenderlo da qualche parte. sta a voi decidere.

My brother  recently graduated from high school! Yay! To celebrate the event I cooked his favourite cake starting from this recipe and decorating it with strawberries, whipped cream and custard. Then I made this cute greeting card to accompany the gift from my parents: the i-fon™.
This owl greeting card is super easy to make and once you've made the owl you can use it not only to decorate your cards but also to seal presents or to hang it somewhere. It's up to you ;-)


Materiali: 

  • Cartoncino robusto.
  • Pennarello a punta grossa.
  • Matita.
  • Carta colorata.
  • Due piccoli bottoni bianchi per realizzare gli occhi.
  • Filo nero.
  • Ago.
  • Forbici.
  • Colla.


Materials:

  • Robust cardboard.
  • A black marker.
  • A pencil.
  • Colored paper.
  • 2 small white buttons for the eyes.
  • Black sewing thread.
  • Needle.
  • Scissors.
  • Glue.


Step 1) Tracciamo il disegno del gufo a matita poi ripassiamo col pennarello nero. Per assicurarci che la sagoma  non sia né troppo piccola né troppo grande  mettiamo i bottoni al suo interno prima di ripassarla con il marcatore.


Step 1) Trace the outline of your owl with a pencil first then with the marker. You can make sure that the outline isn't to small or too big by placing the buttons inside it.

Step 2) Ritagliare il gufo seguendo il disegno.


Step 2) Cut out the owl following the outline you traced.

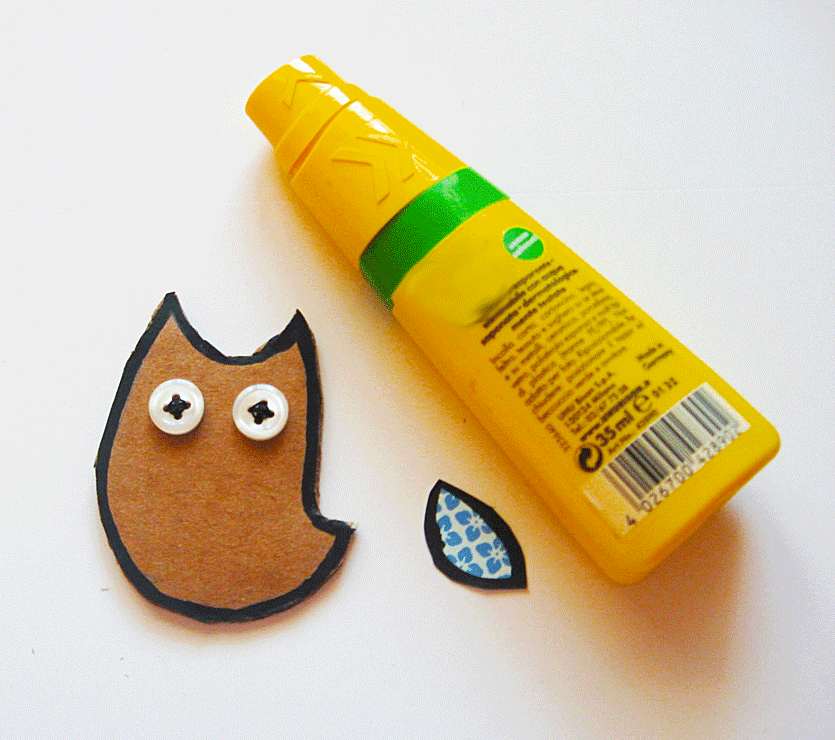
Step 3) Decidiamo dove porre gli occhi del gufo e cuciamoli con ago e filo. Dato che il gufo sarà appiccicato  sul bigliettino, non importa che le cuciture sul retro siano perfette. Le mie, per esempio, erano tutte storte. 


 Step 3) Decide where to place the owl's eyes then sew them onto the cardboard. If the stitches on the back are not perfect don't worry. This part will be glued on your card/present/scrapbook and nobody will see it. 

Step 4) Ritagliamo un pezzo di carta colorata a nostra scelta dandogli la forma dell'ala del gufo. Scegliete pure una forma che vi sia congeniale: la mia è solo un'opzione. Incolliamo l'ala al fianco del gufetto.


Step 4) Cut a piece of colored paper to make the owl's wing. Shape it as you please: mine is just an option. Glue the wing to the side of your owl. 

Step 5) Sempre con il pennarello a punta grossa disegniamo i particolari: il becco e le piume del gufo. Se non vi sentite sicuri al primo colpo, tracciate prima il disegno a matita e poi ripassate col marker.


Step 5) With your marker, draw the beak and the feathers. If you don't feel sure of your drawing skills, trace the details with a pencil first.

Step 6) Ora decidete come impiegare il gufetto. Io ho fatto questo bigliettino per mio fratello ma ci sono un sacco di possibili variazioni! Fatemi sapere.


Dentro al biglietto, eheheh.
Inside the card, ehehe.
Step 6) Decide how to use your cute little owl. I've made this greeting card for my brother but maybe you can think of better ideas! Let me know.


Alla prossima,
Until next time,

Alice